Steps to set up your mac for signing apps
- Install Xcode via app store or developer.apple.com
Note You will need an apple account to download via the app store or a developer account to download the xip file
App Store Screenshot
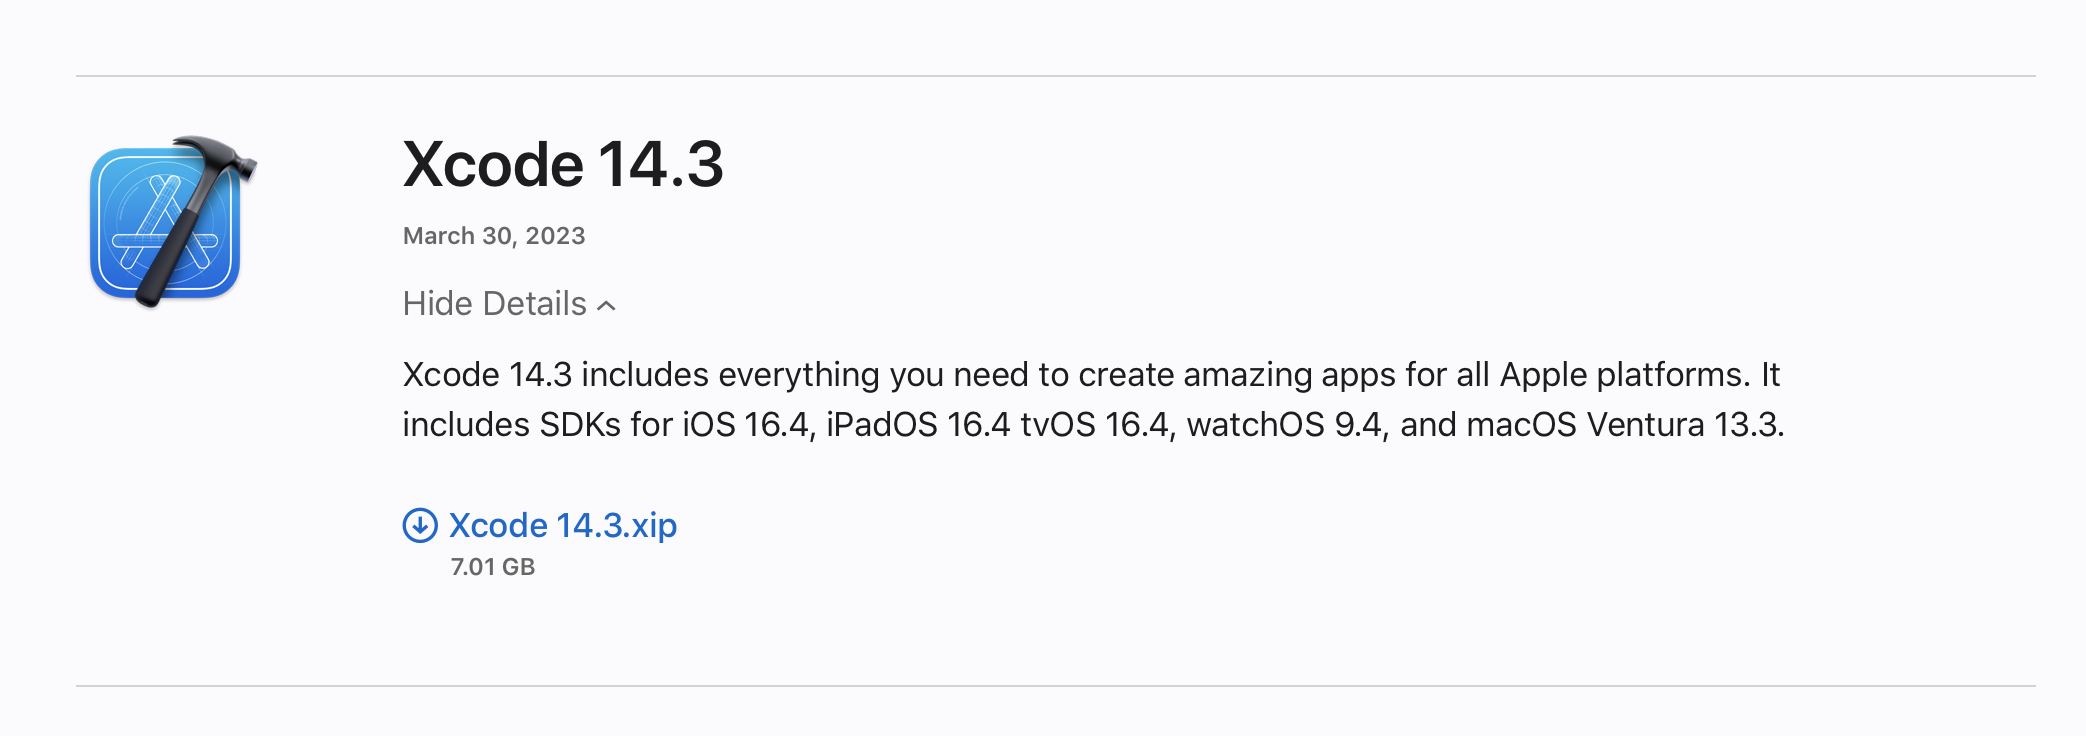
Apple Developer Screenshot
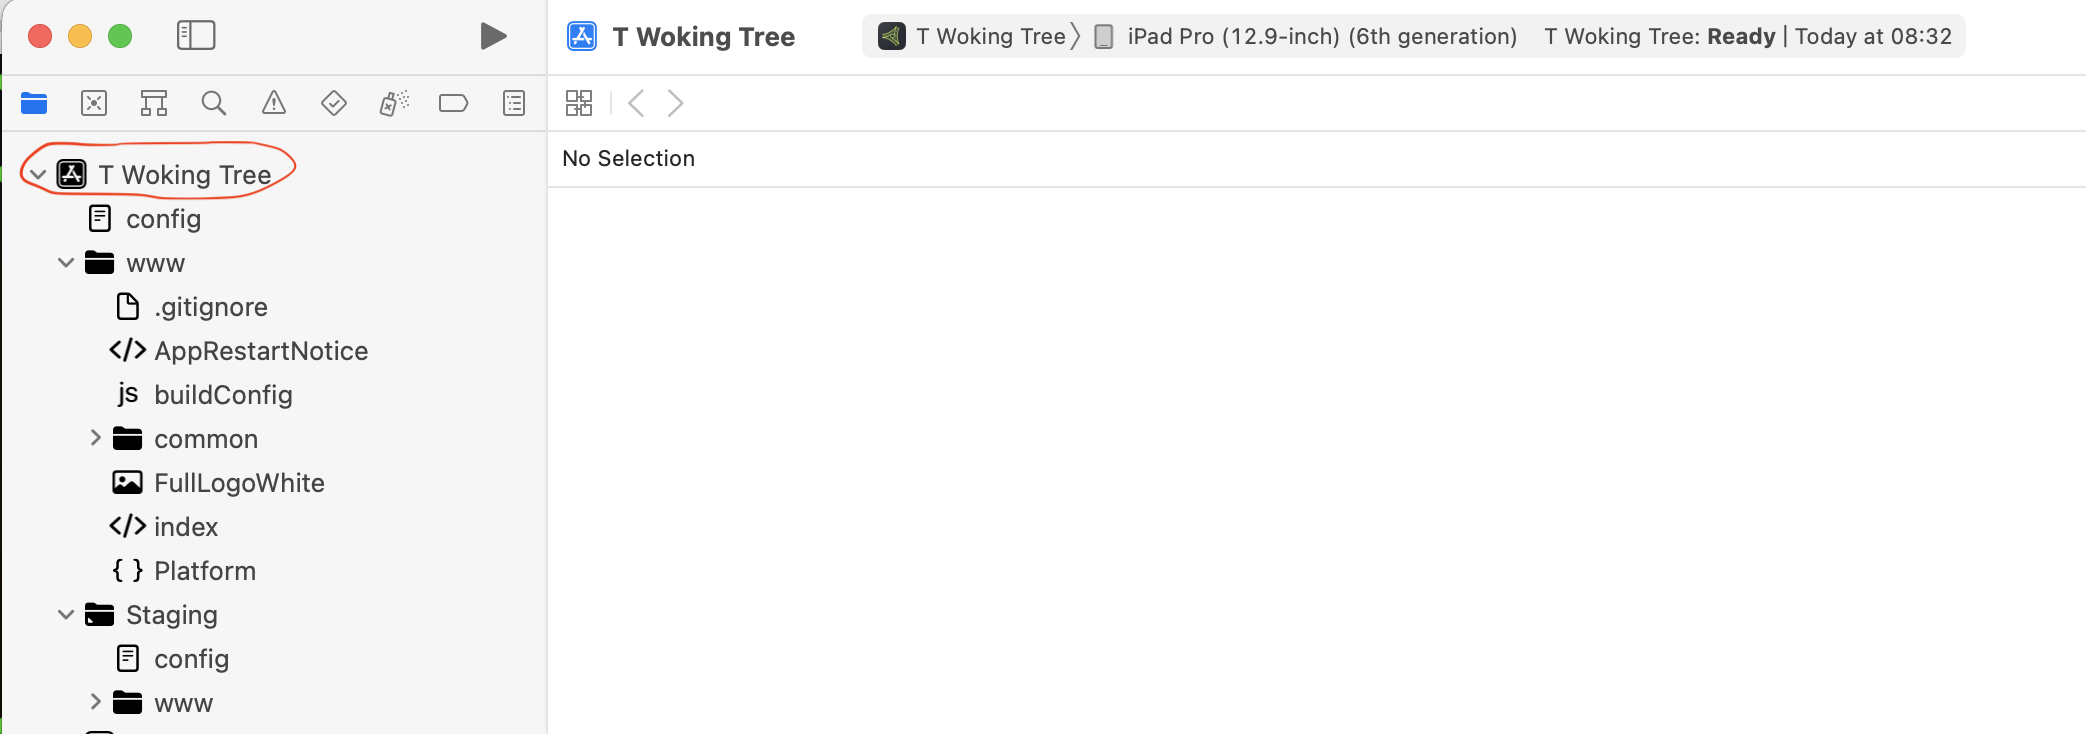
- Locate the signing options in Xcode. You can find them by clicking on the project name in the left hand side bar. You should then see the signing options tab next to general.
Signing options screenshot
- If you have not yet signed into your apple developer account. You will find no teams, click on Add Account to sign in.
Add account screenshot
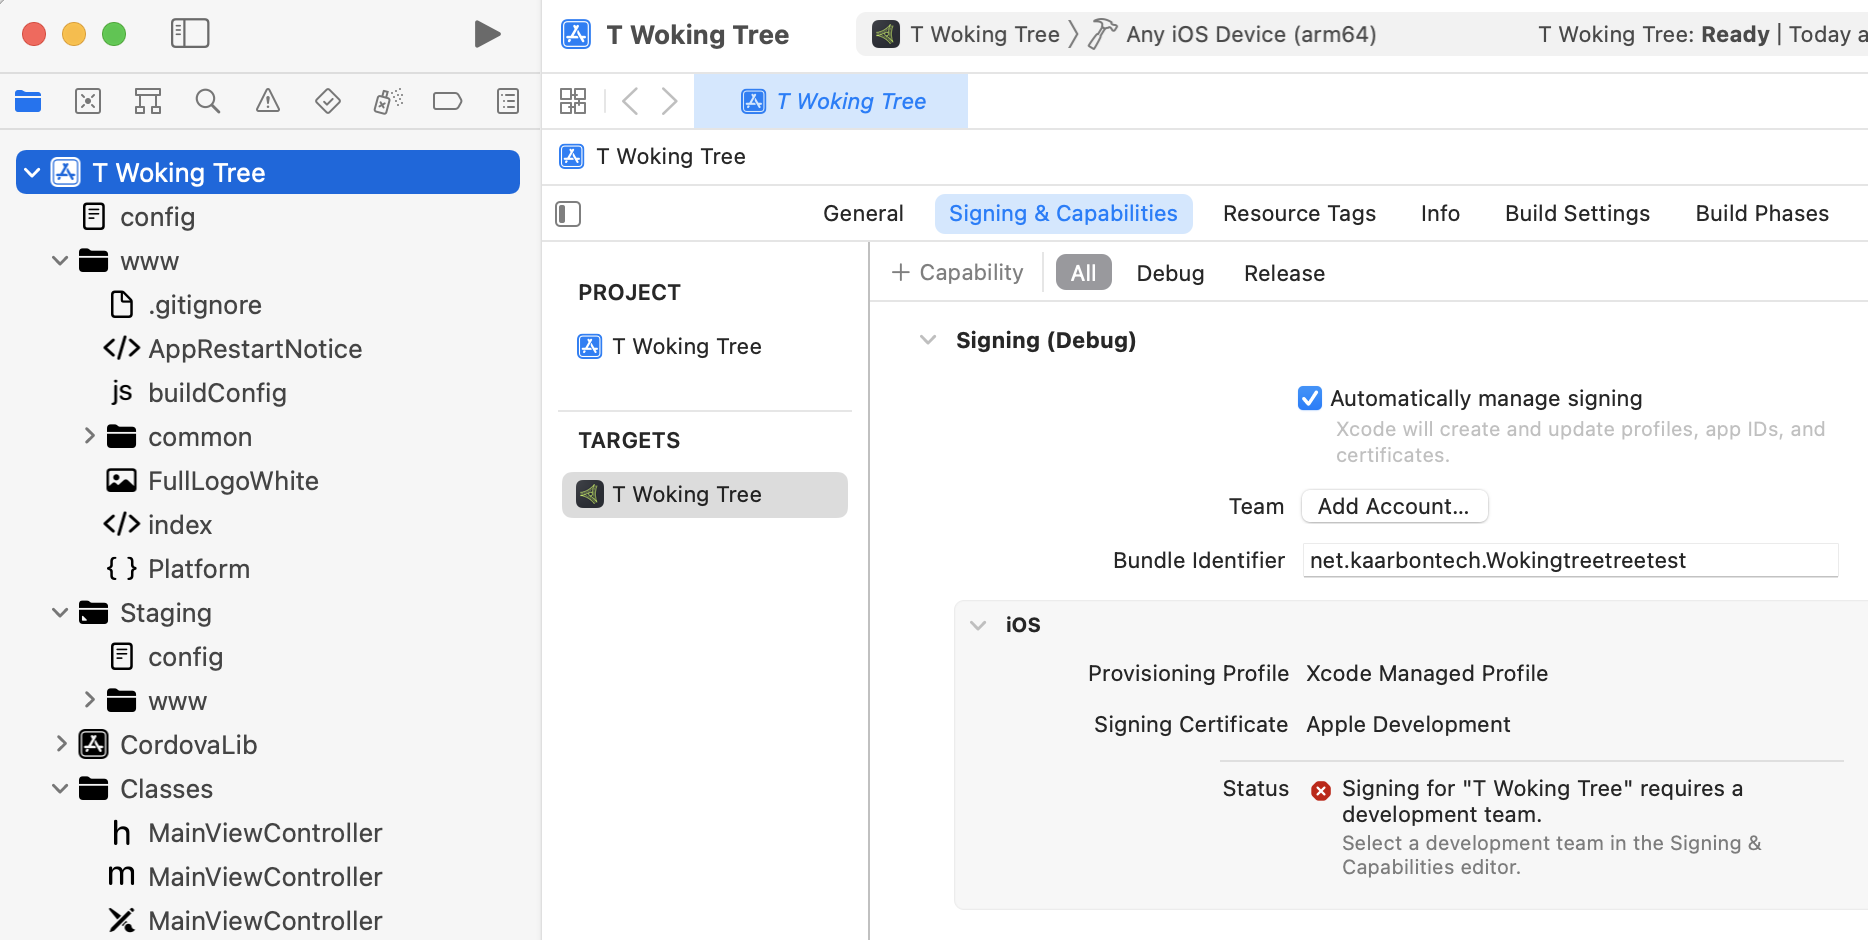
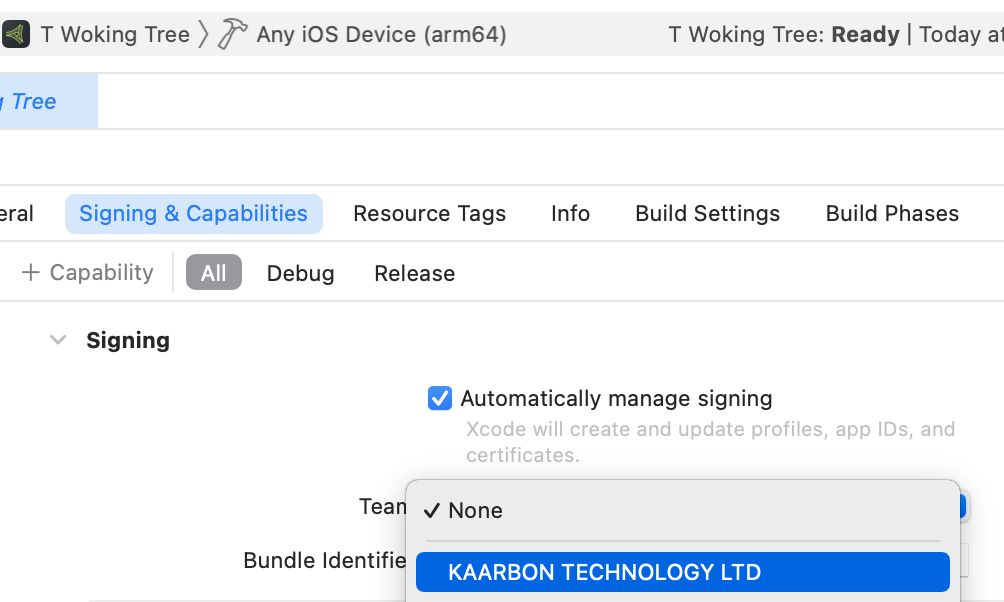
- After signing in and select the team KAARBON TECHNOLOGY LTD.
Select team screenshot
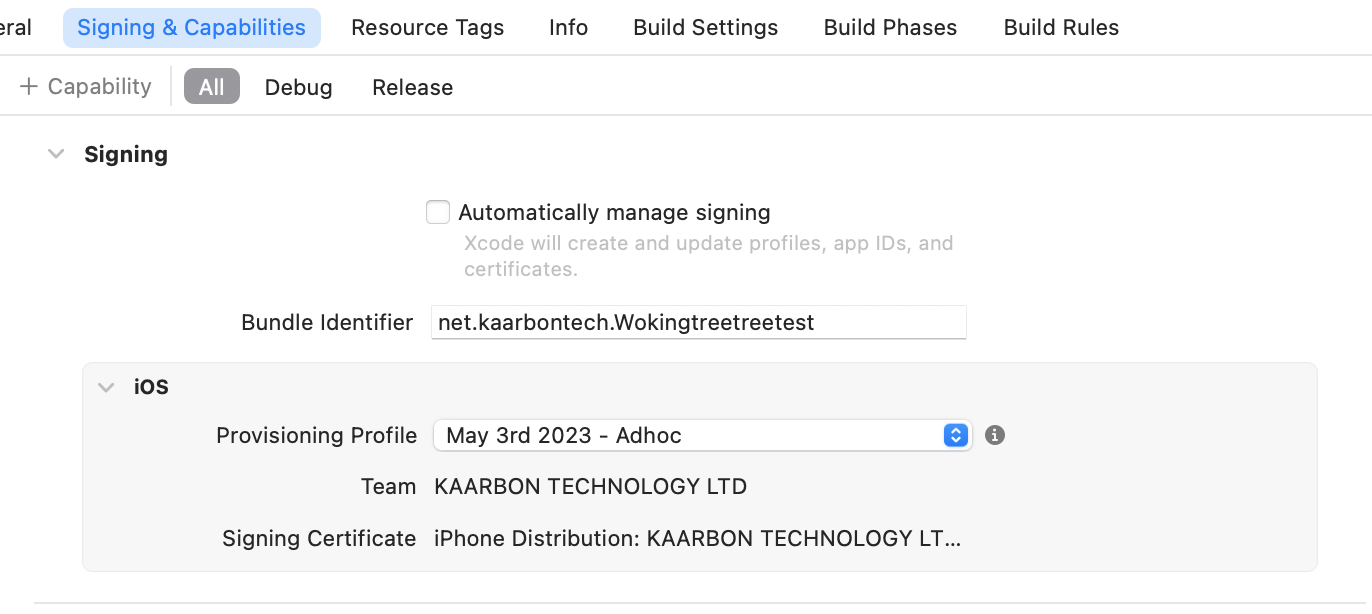
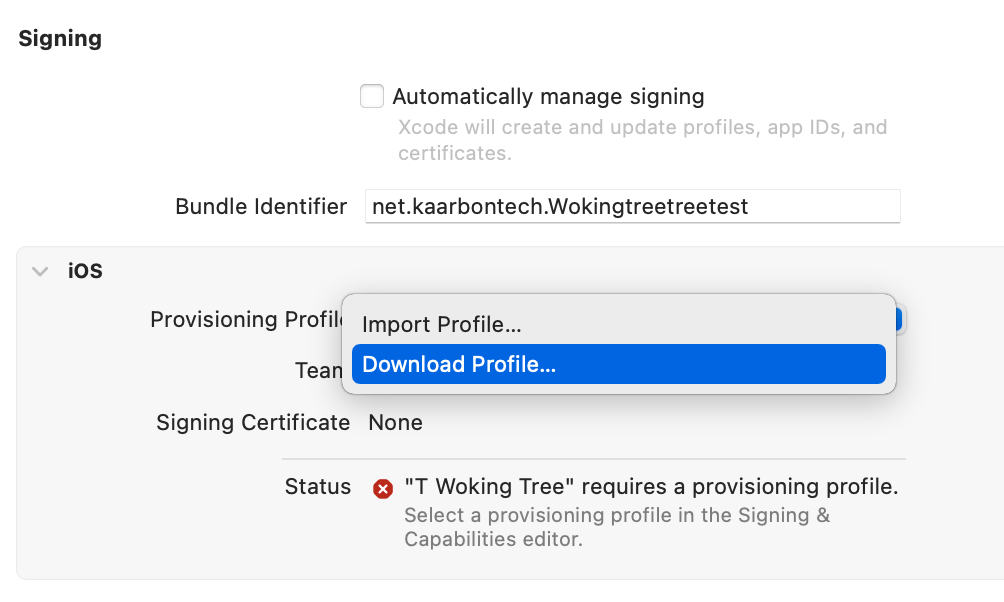
- Untick Automatically Manage signing to reveal extra options and select Download Profile from the Provisioning Profile dropdown
Profile dropdown screenshot
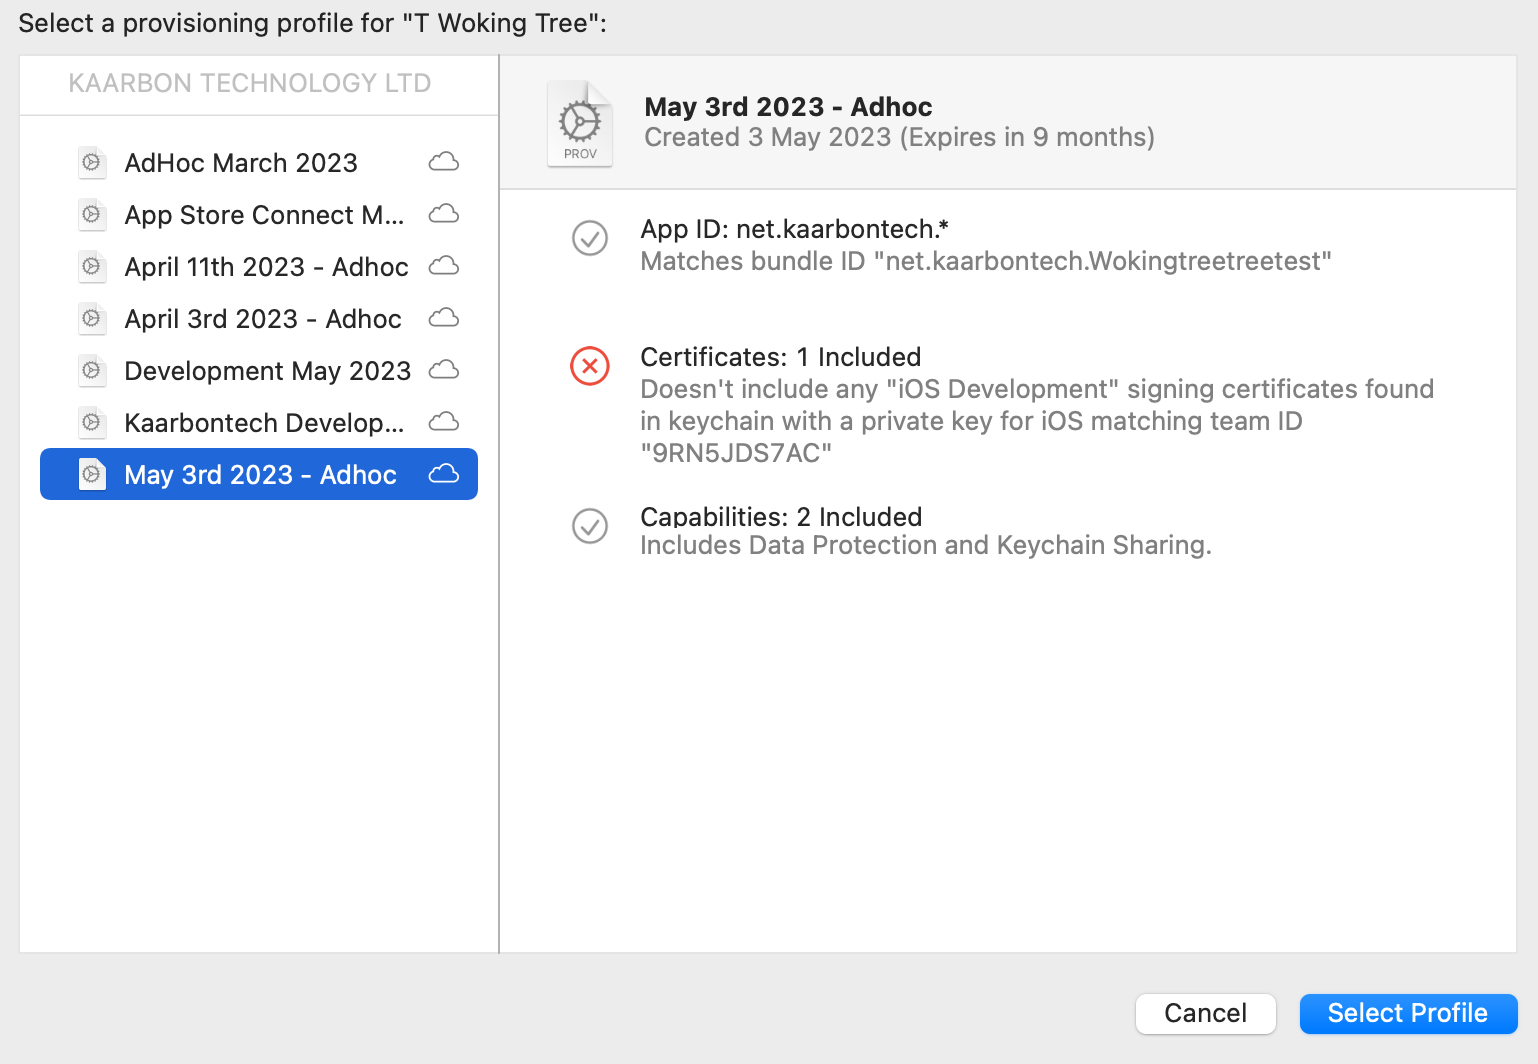
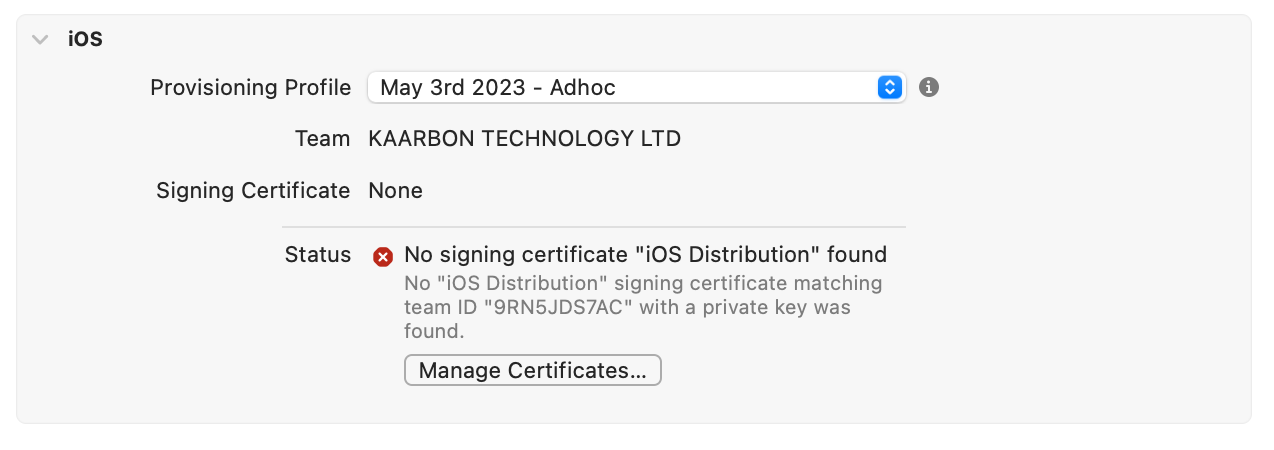
- Select the most recently created adhoc profile by date. You will then receive an warning that there is no signing certificate for that profile. This is expected.
Available profile download screen
- Visit developer.apple.com to download the latest distribution certificate. Make sure the certificate is an iOS Distribution and not Developer. Visit it's main page to download the pem file. Double click on it in the finder to add to your keychain.
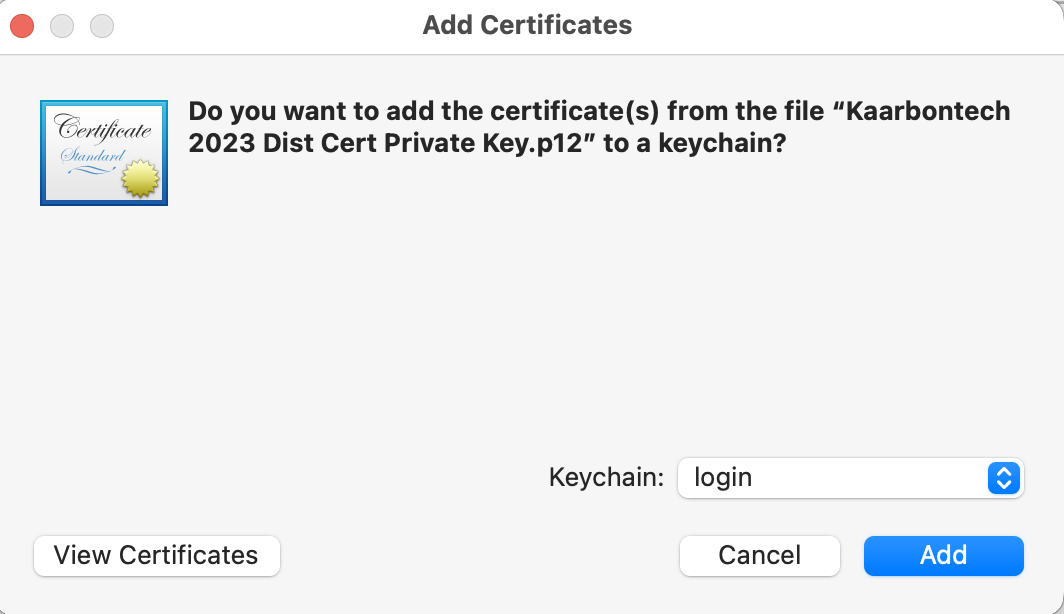
- The cert needs a private key to be installed to your login keychain to work with xcode. It is a p12 file stored in 1password under "Apple KT dist cert 2023 private key". It is password protected and is with the file on 1password. Make sure to add the p12 cert to your login keychain.
Private key installation screenshot

You may get an error that the contents cannot be retrieved. This can usually be ignored, but if the next steps do not work for you. You can try installing the p12 file via the security cli tool.
bash
security import priv_key.p12 -k ~/Library/Keychains/login.keychain- Restart xcode and reopen the project. You should now find the certificate warnings have gone, and you're ready to sign apps.
Ready to sign screenshot